This was a DIY project in that I saw and did for my secrete Santa. I shopped around to fine Styrofoam pairs. I stuck a wooden skewer in them and spray painted then stuck that in a large block of Styrofoam to let them dry once they were dry I modge podged them using a foam brush and then rolled them in glitter and continued to let them dry again. I also did apples which turned out well but were more difficult because glue and paint drips hardened on the spheres.
Showing posts with label DIY. Show all posts
Showing posts with label DIY. Show all posts
Tuesday, January 24, 2012
Stuffing Party
I have taken on helping my friend with her wedding recently we held a fondue party so that she could have assistance with her DIY invitations. It was a great hit with cheese fondue for starters, meat for a main course, and chocolate for dessert. We called it a stuffing party.Here are the pictures.
I used Pyrex dishes I received as a gift from a dear and wonderful Friend Nancy, they were also my guest of honors favorite color and wedding theme color., so it made for a nice tie in.
We used serving trays that we had painted with chalk board spray paint to label the different types of sauces available to try.
We used serving trays that we had painted with chalk board spray paint to label the different types of sauces available to try.
I decided to use paper towel instead of napkins because it would hold up better I folded it in half then down to create a pocket for the poker and fork.
Underneath the fondue pots are 6 tiles I picked up at the local hardware store for 16 cents a piece. I did this to protect the table from unwanted oil spills. I was also able to use my plate tier to help corral and organize the food choices. We swapped these oil pots out for small crock pots to melt the chocolate in
Meat should be cooked at 350 degrees
Chocolate at warm
and Cheese at 200.
Ornaments
I found my self wondering around Micheal's the other day and couldn't help but resist purchasing several glass ornaments. I decided to purchase them with out any idea to do with them. Here is what I came up with.
These three I took glittery ribbon and used a siccor blade to curl it then removed the top of the empty ornament and feed small langhts of the ribbon into the opening and then replaced the top adding extra ribbon to the top.
For this one I stuffed it with tinsel and painted a black stripe around it then using a gold glitter pen maid a box to mimic Santa's belt.
Monday, December 12, 2011
Holiday Center Pieces
Reuse that gift basket you got last year to put flowers in , by a Styrofoam piece to put inside and attach to the bottom of basket, The purchase stems from your favorite store and try to space evenly.
Use your favorite vase or glass holding piece to group cheap ornaments form the dollar store, for depth add lights or strings of beads for texture.
Place trees at various levels on a plate add candles or ornaments here and there in the plate. Add a large wreath to place around it.
Santa's Belt Insperation
Stuffed left over tinsel in an ornament painted black stripe on the ornament and then drew a gold glitter box like a buckle on it with a glitter gel pin
Tissue Paper Trees
3 Styrofoam cones
Hot glue and hot glue gun
Several pieces of desired color tissue paper
Pencil
Scissors
- Cut tissue into squares about one inch by one inch.
- Wrap tissue paper around the eraser end of a pen(place in the middle of square when wrapping) and using glue gun put a dot of glue on the paper.
- Then touch it to the the cone going up and down.
- Place it closely together.
- Then cut on an angle from the top of the cone down with the scissors to trim the tree shape. (DO this part of the garbage can) save you from some headache clean up.
Sunday, December 11, 2011
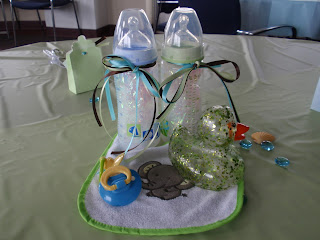
Baby's Shower Ideas
Meatballs, cucumber sandwiches, dips, chips, crackers, chicken sandwiches
Party favors are boxes shaped in bottles tied with ribbon, I placed two square guests soaps in each one, the soaps I bought from TJ Maxx for about 4-5 dollars there where 12 in each box. Which made the favors about 30 dollars.
The Glass Act
Took those small Halloween plastic rings that come in shapes modge podged them and dipped in glitter make for fun and cheep wine rings, also took about 20 mins to do with prep and all.
Found these at the dollar store so I put them on earings and uded as wine glass rings.
I saw these in the store, to make them I covered the top with news paper, and used painters tape around the bottom to establish an even line and used chalk board spray paint, I was able to find chalk at the dollar store to send with them. The glasses I bought at the dollar store.
Statement Necklace
Took resien drops and glued to felt using E600 glue, attaches with a magnetic purse clasp I attached before adding design, backed the felt with fabric stiffener then added another layer of felt underneath so it lays comfortably on the skin.
Message Board
Took the frame of a cork board and covered it with fabric using a staple gun then took a roll of ribbon and and attached it in a vertical pattern adhering it to the edge with a staple gun.
Monday, December 5, 2011
Jewelry Making I


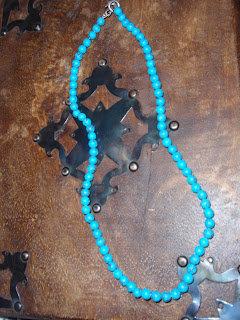
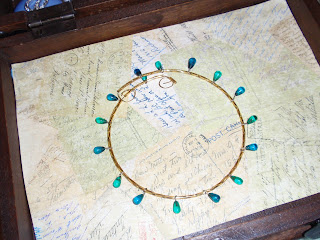
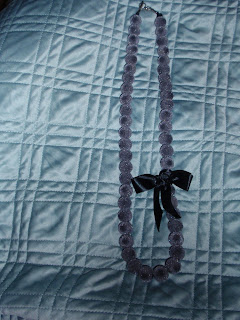
I tend to raid the clearance jewelry at Micheal's and Hobby lobby, aside from my findings and claps I almost always try to re-purpose broken jewelry or buy sale items.
The squares are from hobby lobby and are easy to do I take pictures or pieces of paper I like and put them inside a pre-made box and close it up.
The crystal with a bag piper is a piece of paper I printed of and modge podged onto the back and sealed.
The pearls and sequins are from sale box and an old belt clasp I turned into a catch.
The keys are old ones that I could not find a use for so I glittered them.
The rest are charms I found and made into necklaces
Hair There
I made this come using loose pearls, a comb, wire, and pre-made pearl sticks. Wrap the loose pearls and wire over the pre-made pearls laying flat on the comb as you work pretty easy. Fun for bridesmaids. Spread the wired pearls out when your done, make sure to move them where you want as you wire.
I bought ribbon and hair clips from the dollar store, make bows and tie off using small thin thread. Take an extra piece and using hot glue, glue around the middle of the bow to cover the thread. Then hot glue to a hair clip.
These are simple they are small alligator clips, that have the ribbon hot glued over both edges of the clip. Make sure to open while they are drying so they do not stick together, great for babies and toddlers.
Bobby pins and rhinestones with supper glue pretty simple and fun!
Friday, November 25, 2011
Wordle-as a Gift
Adam made this for me a few year ago, I love it because it is a combination of all the words that make up us and who we are as a couple. I decided to tie in the colors by adding white brown and blue damask shapes by stenciling them on. He went to the wordle website! You can do this for children, vacations, sports, anything you can think of its great!!!
Christmas Crafts
Took a preety felt piece and added reisen dropps to it to hang from wall took 15 minutes
I use this piece year round but added some holly from Hobby Lobby for the season!
Fall Floral Pieces
All of these were done using clear floral tape and the 1 by 1 inch grid pattern on them the top picture was about 30 dollars and the bottom two were between 15 and 20 dollars for the materials.
This piece was just a fun and easy piece to throw together to create a beautifull center piece. I reuse the basket for all holidays.
Subscribe to:
Posts (Atom)


